

How To Install A Korky Fill And Flush Toilet Repair Kit
Korky Toilet Repair Kit Review & Install Guide
How to prepare a leaking, running or noisy toilet with the Lavelle Korky 4010PK repair kit including a consumer'due south opinion.
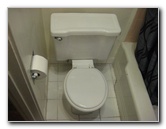
Old 1960's Home Toilet
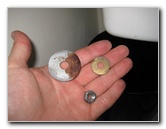
Rubber Flapper Falling Apart
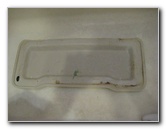
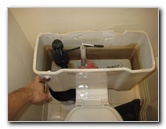
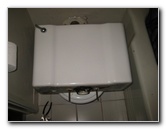
Remove Ceramic Tank Lid
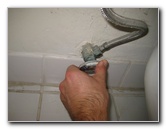
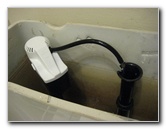
Some of the issues included h2o leaking from the tank to the basin, the flapper wouldn't seat correctly after flushing and the fill valve would constantly be turning on to partially re-fill the tank due to the leaks.
The constant noise from the toilet, always having to "jiggle" the flush handle and the high h2o bills were driving me crazy.
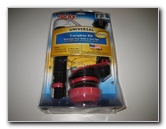
Since I've used the Fluidmaster Kit in the past, I decided to endeavor the Korky Universal Complete Repair Kit # 4010PK fabricated by Lavelle. I got it from Amazon.
The Fluidmaster 400AK kit includes a new flush handle, which the Korky does not.
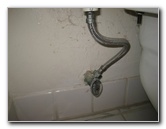
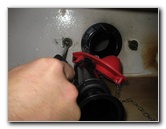
Toilet Water Supply Valve
Shut Valve Clockwise
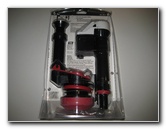
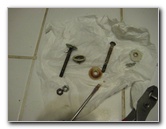
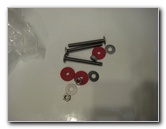
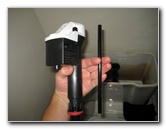
Korky 4010PK Kit
All of the parts in the kit seemed to be high quality plastic, prophylactic and metal hardware particularly because the depression toll. A 2 sided instruction paper was included with illustrations and clearly laid out steps.
The outset few steps for installing the kit are to remove the tank lid, close the h2o supply valve by turning it clockwise until it stops and then flush the toilet to bleed the water from the tank.
Affluent Toilet - Empty Tank
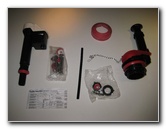
They included the make full valve assembly, affluent valve assembly, cream rubber gasket (between tank and toilet bowl), a pocketbook of mounting screws with prophylactic and metal washers, the condom make full tube, and two plastic nuts for securing the water supply line to the tank.
Old Flapper Valve Broke
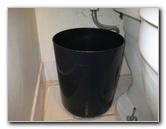
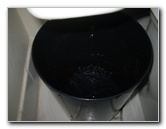
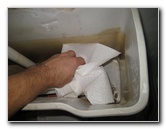
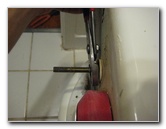
Trash Can Below Tank
Twist Off Water Supply Hose
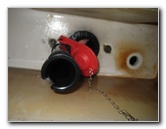
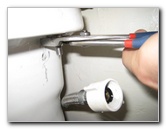
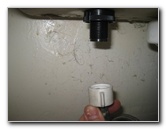
The next pace is to place a bucket or small trash can beneath where the water supply hose attaches to the underside of the tank. Twist off the plastic nut that holds the hose in place by turning it counter clockwise.
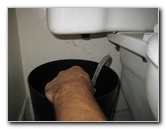
Insert Hose In Saucepan
Loosen Fill Valve Nut
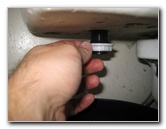
Spinning Off Nut
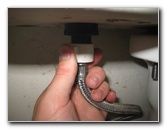
Loosen the plastic fill up valve mounting nut by hand or with a pair of pliers and turn it counter clockwise to remove information technology.
Fill up Valve Nut Removed
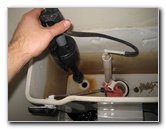
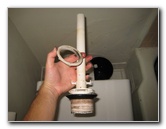
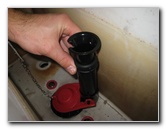
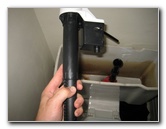
Pull Out Sometime Make full Valve
H2o Draining From Tank

Disconnect Tube From Flush
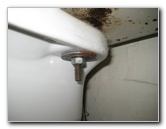
Toilet Tank Mounting Screws

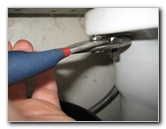
Loosen Counter Clockwise
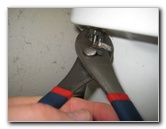
Move to the bottom of the tank and loosen the two basics on the mounting screws by turning them counter clockwise with a pair of pliers.
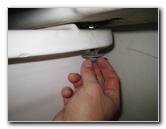
Spin Off Mounting Nuts
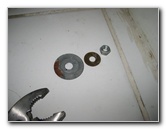
Nut & Washers Removed
Loosen Other Nut
Soak Up Remaining Water

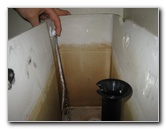
Lift Toilet Tank Off Bowl
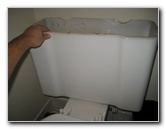
Carefully lift the tank off the toilet bowl and rest the back side on top of the seat lid.
Rest Toilet Tank On Seat
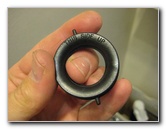
Pull Off Old Sponge Gasket
Sponge Gasket Removed
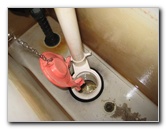
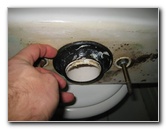
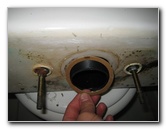
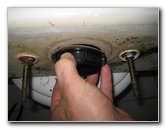
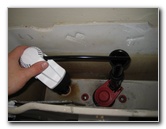
Twist Off Flush Valve Nut
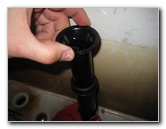
Pull Out Erstwhile Flush Valve
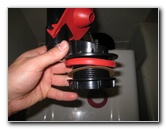
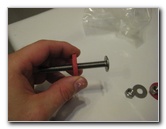
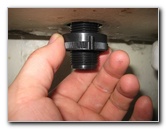
New Affluent Valve
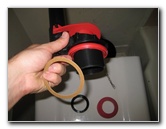
Tan Chipboard Washer
Washer On New Valve
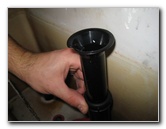
Orientate New Flush Valve
Insert the affluent valve in to the tank with the flapper facing towards the make full valve hole at an angle. (See Picture # 53.)
Place the chipboard washer on to the flush valve threads at the bottom of the tank.
Hand Tighten Plastic Nut
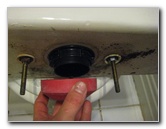
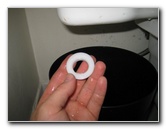
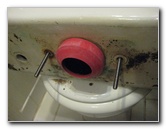
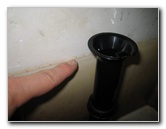
Push On New Gasket
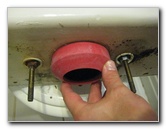
Gasket Flush With Tank
Push button the wider end of the new blood-red condom sponge gasket on to the bottom of the new flush valve. Make sure that the gasket is flush confronting the bottom of the tank with the narrower cease pointing out towards you.
Hold Screw In Identify

Loosen Tank Basics
Old Tank Hardware Removed
New Tank Hardware
Condom Washers On Screws
Push the new rubber washers all the way to the elevation of the new screws.
New Screws Installed
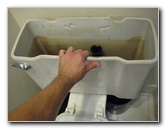
Lower Tank On Bowl
Attach Washer & Nut
Carefully lower the tank downwards on to the toilet while lining up the 2 screws with the holes at the rear of the bowl.
Attach a metallic washer and nut to each of the mounting screws.
Slowly Tighten Both Sides

Tank Tight Confronting Bowl
One time the tank just barely makes contact with the toilet basin, very carefully go along tightening the nuts until the tank no longer wobbles when you touch information technology.
![]() Be very careful to not over tighten the mounting nuts, or you take a chance cracking the ceramic toilet bowl and/or tank.
Be very careful to not over tighten the mounting nuts, or you take a chance cracking the ceramic toilet bowl and/or tank.
Bank check Tank Doesn't Wiggle
Loosen Flush Valve Nut
Accommodate To Above Water Line
Raise the top of the overflow tube until it is 3/four of an inch above the water line and about 1" below the affluent level nut.
iii/4" Higher up Water Line
Tighten Adjustment Nut
ane" Below Affluent Lever Nut
New Fill Valve & Tube
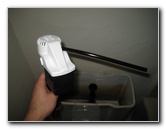
Attach Tube To Superlative Valve
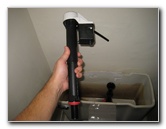
Unlock & Extend Valve Body
Unlock the big adjustment tube on the new fill valve by turning information technology counter clockwise about 1/iv turn.
Extend the tube all the way out.
Line Up Two Valves
Twist To Lock Fill Valve
Tube Direct To Make full Valve
One time the fill valve has been adjusted to the correct acme, lock it by gently twisting the lower tube 1/4 turn clockwise until you hear a click or "snap" sound.
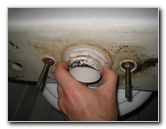
Re-insert the new fill valve with the small make full hose facing directly towards the overflow tube.
"This Side Upwards" Nut
Tighten Fill Valve Nut
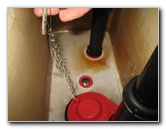
Attach Chain - Minimal Slack
Twist on the nut at the bottom of the tank to secure the new fill valve in identify. Just hand tighten the nut until it is snug.
Attach the chain from the flapper valve to the flush lever with a very minor amount of slack.
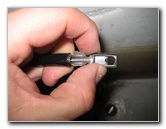
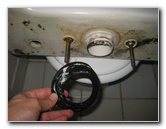
Push Metallic Clip In Tube
Attach Hose To Fill Valve
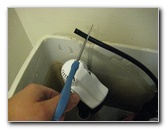
Trim Excess Tube Off
If the fill hose kinks or is but too long, trim off a brusk section so that it only has a small bend in it.
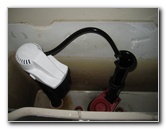
Filler Tube Installed
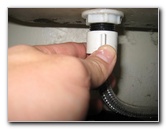
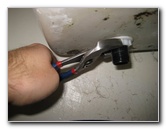
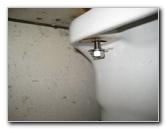
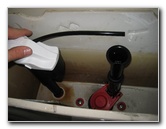
Water Supply Line Nut
Hand Tighten Plastic Nut
Some types of h2o supply lines volition be able to utilize the new plastic nut in the kit.
Our water supply line was a braided stainless steel 1, and so I merely re-used the old nut.
Spin on the h2o supply line and tighten the plastic nut to just past mitt tight. Practice non use a wrench to tighten the nut or over tighten it since yous may damage the rubber washer and crusade a leak.
Turn on the h2o supply by turning the valve all the way open in the counter clockwise direction until information technology stops. Make certain that the valve is fully open to firmly seat the safety washer inside of information technology and prevent a leak.
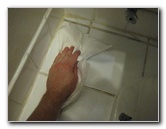
Make clean Water Off Floor

Put Down Newspaper / Cardboard
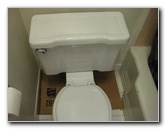
Leaky Toilet Fixed!
Identify some newspapers or paper-thin below the toilet tank so you can quickly see if in that location are any leaks over the next few days.
Enjoy your quiet toilet and lower water bills! ![]()
Overall, I found the Korky 4010PK kit to be relatively like shooting fish in a barrel to install and it seems to be working peachy.
If I had realized that it didn't come up with a new flush handle, I may take chosen the Fluidmaster kit.
Although I don't like that the Fluidmaster kit I previously used required that I cutting the overflow tube with a hack saw, which can exist a problem if you cut off too much.
Plus I prefer the more advanced fill valve in the Korky kit compared to the older design floating cylinder on the Fluidmaster fill valve.
For more, check out my other Home Repair & Maintenance Guides.

Source: https://www.paulstravelpictures.com/Lavelle-Korky-4010PK-Toilet-Repair-Kit-Review-Install-Guide/
Posted by: sticklesstes1943.blogspot.com
0 Response to "How To Install A Korky Fill And Flush Toilet Repair Kit"
Post a Comment